Launching Virtual Machines
This tutorial is part of the Cloud Starter Series.
Back to Cloud StarterCategory: Beginner
Difficulty: 1 out of 5
Duration: 25 minutes
Find a mistake? Let us know the issue here.

Details, Source and Flavor
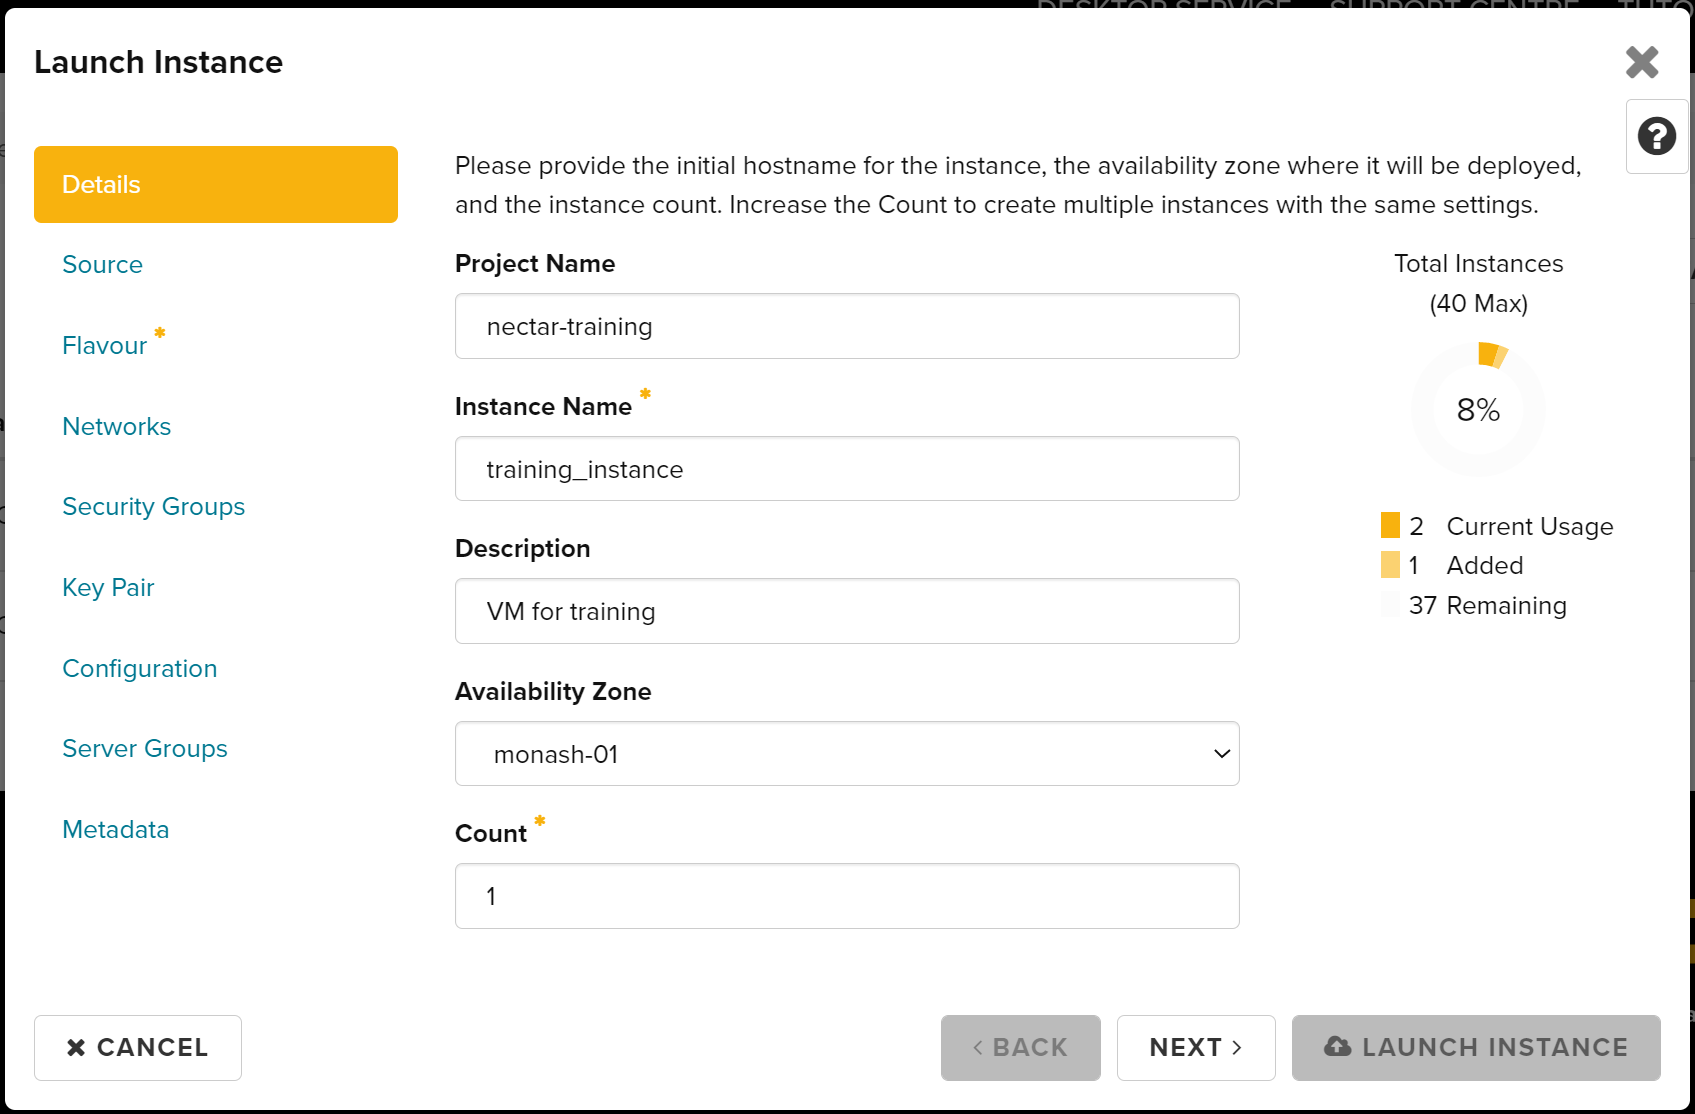
Details
Your instance must have a name; a description is optional. In certain circumstances you deliberately choose the Availability Zone, but you can also let Nectar decide by choosing Any Availability Zone. You can launch multiple instances at a time by setting the Count (e.g. 2 will launch 2 VM’s).
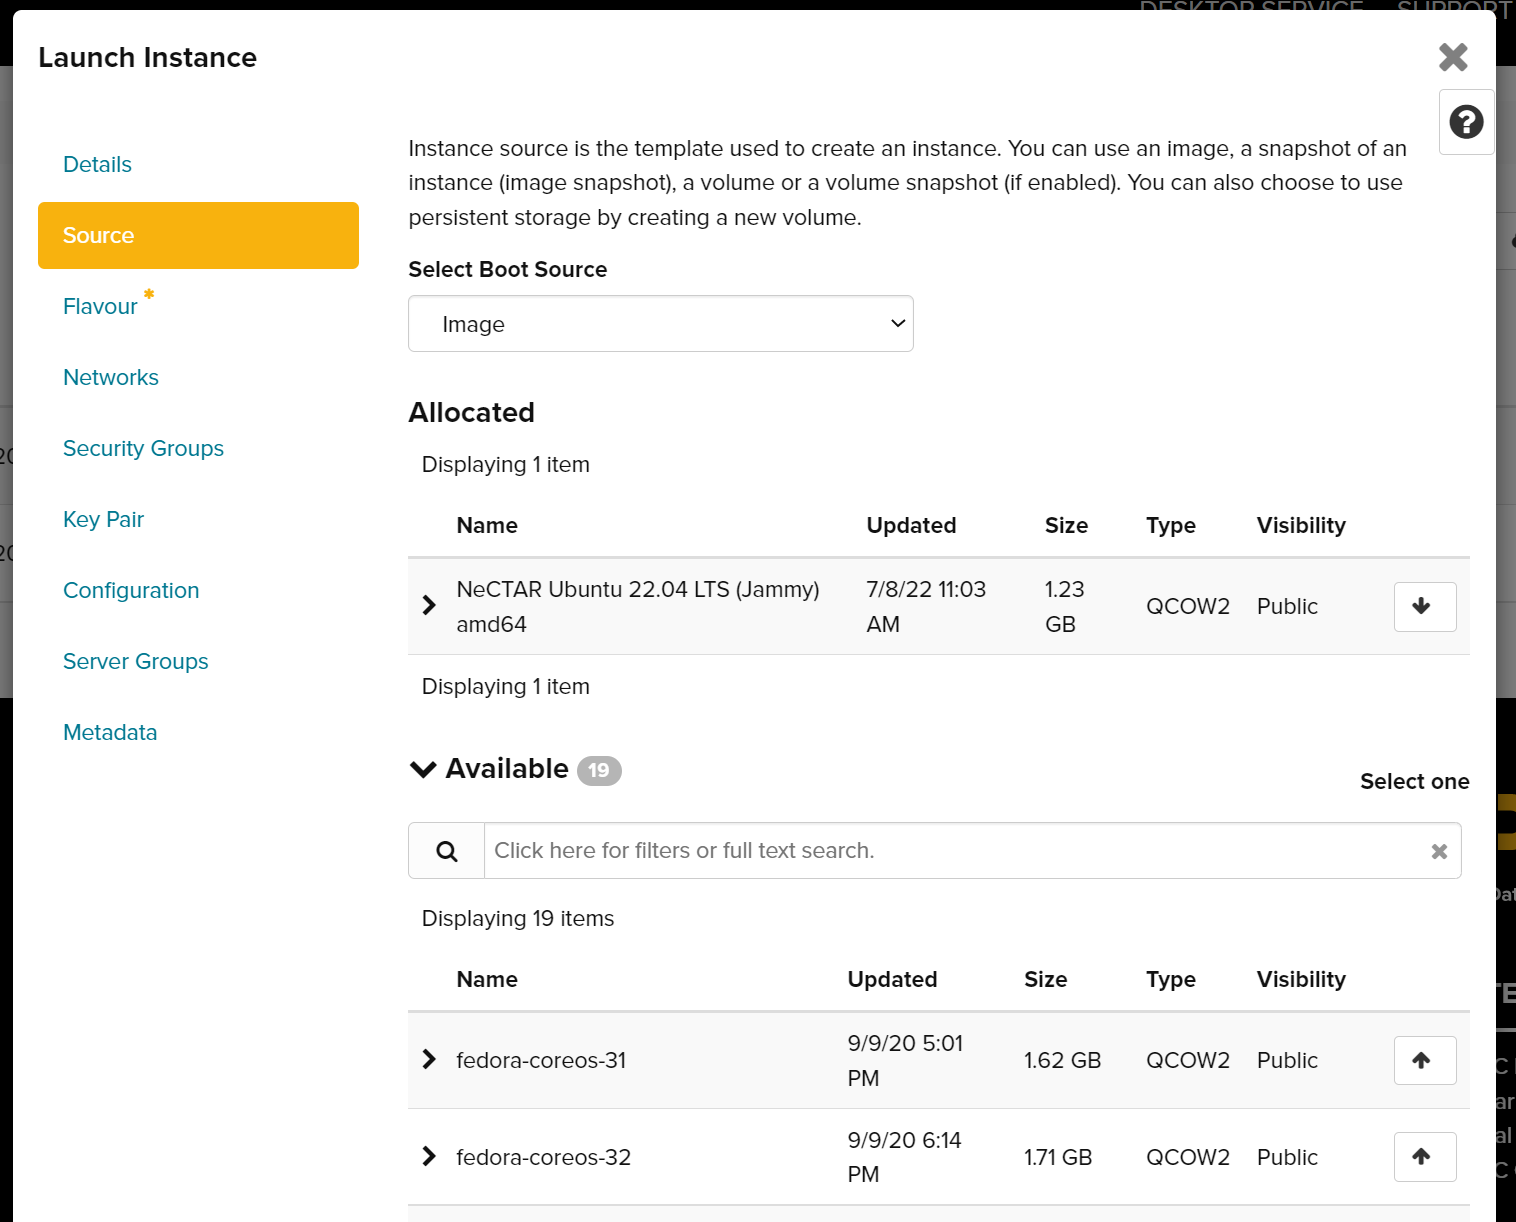
Source
Let’s choose a Boot Source, for this tutorial, we are are going to select NeCTAR Ubuntu 20.04 LTS (Focal) amd64.
Use the Filter widget to help you find the image you need; Use the up-arrow button beside the image you need to select it for launch
If you started the Launch dialog from the Images page, instead of the Instances page, the Source tab is already configured right. If you need to, you can make changes.
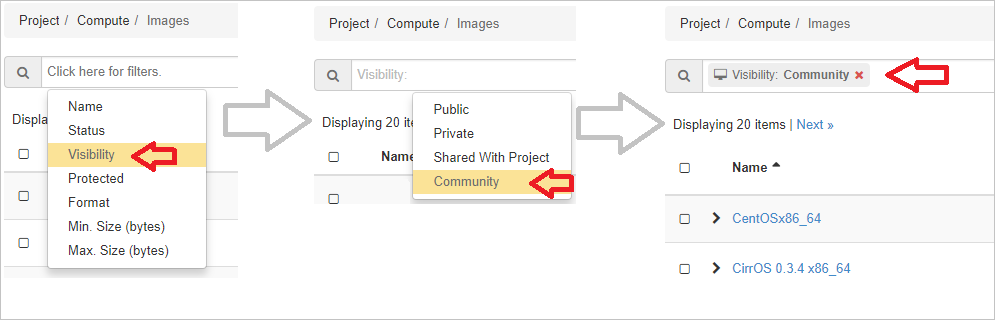
Filters
A quick word on Filters: Throughout the Nectar Dashboard you’ll find filters to help you find images, flavors, security groups, networks etc. You can type free text into filters, or build specific filters as shown in the example here.
Flavor
Use the Filter widget to help you find the Flavor you need.
For this tutorial, we are going to select t3.small.
Use the up-arrow button beside the flavor you need to select it for launch
