Advanced Networking
Category: Advanced
Difficulty: 5 out of 5
Duration: 58 minutes
Find a mistake? Let us know the issue here.

Create a network
Below is a practical example of creating a private network, a private subnet within the private network, a virtual router, attaching the virtual router to the private network and the external network, then launching an instance with private network configuration, attaching a floating IP to the instance and configuring the network within the instance.
Step 1. Create a Private Network:
Step 1a. Once you have been granted a network quota allocation, select the desired project from the Nectar dashboard and navigate to the Network -> Networks tab:
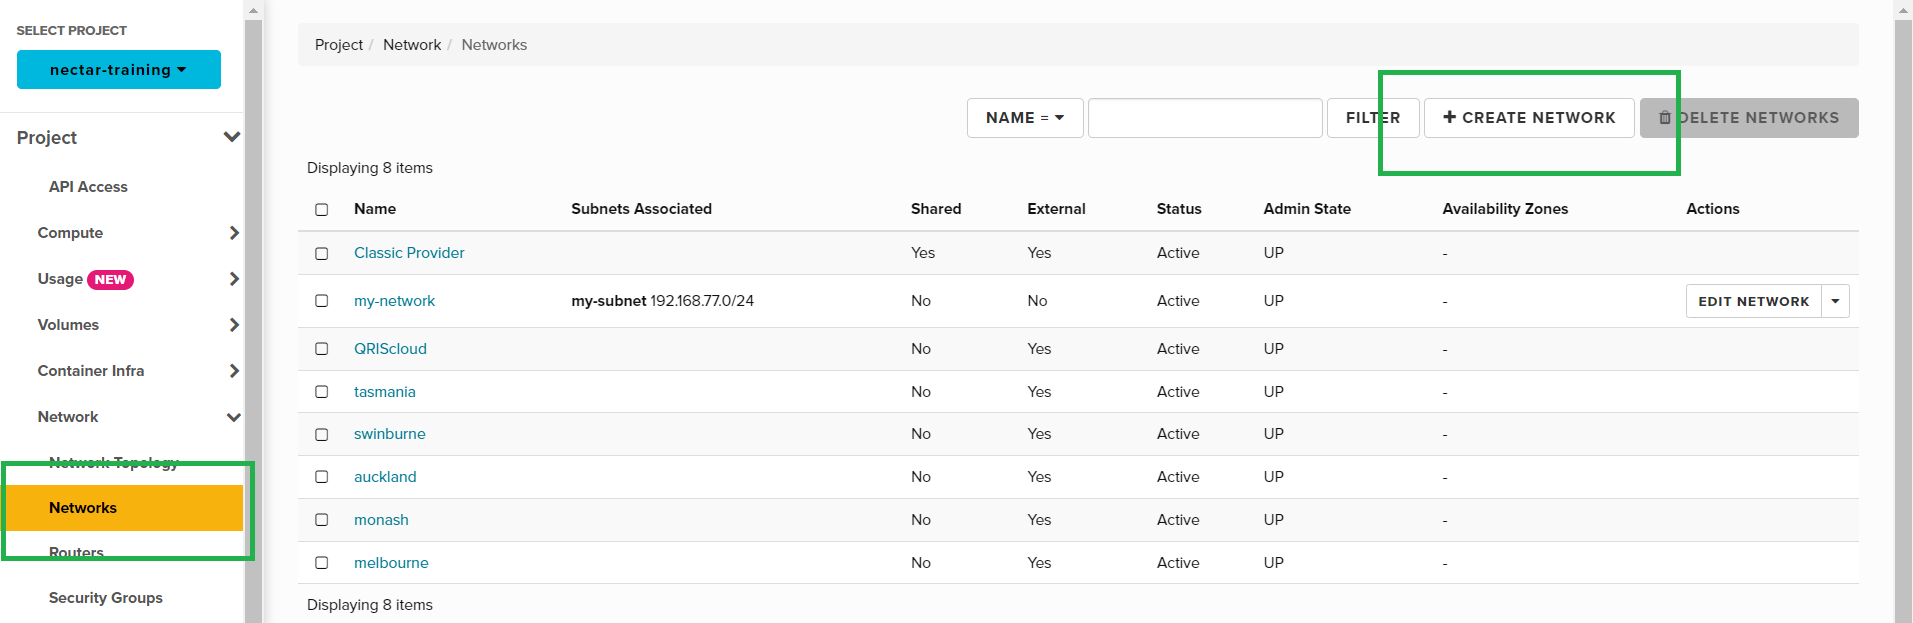
Step 1b. Click the Create Network button.
Step 1c. From the Create Network window enter a name for your private network, and click Next:

Step 2. Create a Subnet within a Network:
Subnets specify IP ranges that can be used within this network.
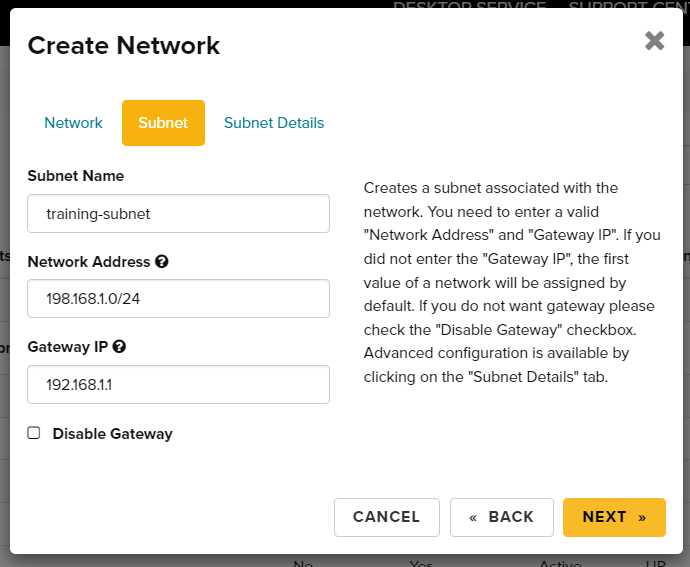
Step 2a. From the Subnet tab complete the following fields and click Next:
- Subnet Name
- The Network Address specified in CIDR notation
- Set the gateway IP as the first address in your network (or leave blank and this will be done automatically). Gateway needs to be enabled if your instance relies on the OpenStack metadata service to bootstrap or operate (all NeCTAR Official Images do), or if you require communication to devices outside of this subnets (eg the Internet). If you disable the gateway, the next tab Subnet Details will not be available. The instance operating system will simply not get the 0.0.0.0/0 default route if gateway is disabled. You can always change your mind later by clicking on your private network, then clicking Edit Subnet next to the subnet which you wish to change Gateway settings for.
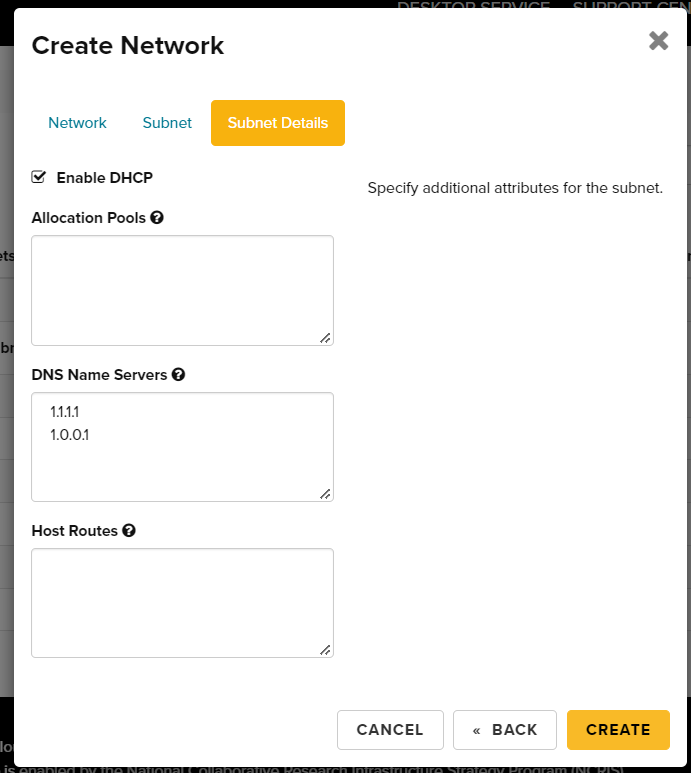
Step 2b. From the Subnet Detail tab complete the following fields and click Create:
- Tick “Enable DHCP”
- Allocation Pools
- DNS Name Servers
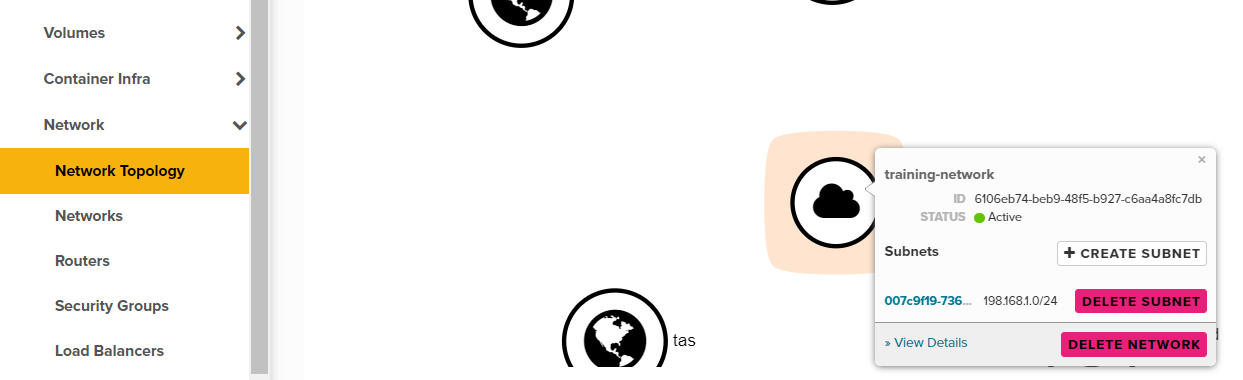
You can refer to the Network -> Network Topology tab for a visual representation: