DNS with the Nectar DNS service
This tutorial is part of the Cloud Two Series.
Back to Cloud TwoCategory: Intermediate
Difficulty: 2 out of 5
Duration: 20 minutes
Find a mistake? Let us know the issue here.

Create a Record Set
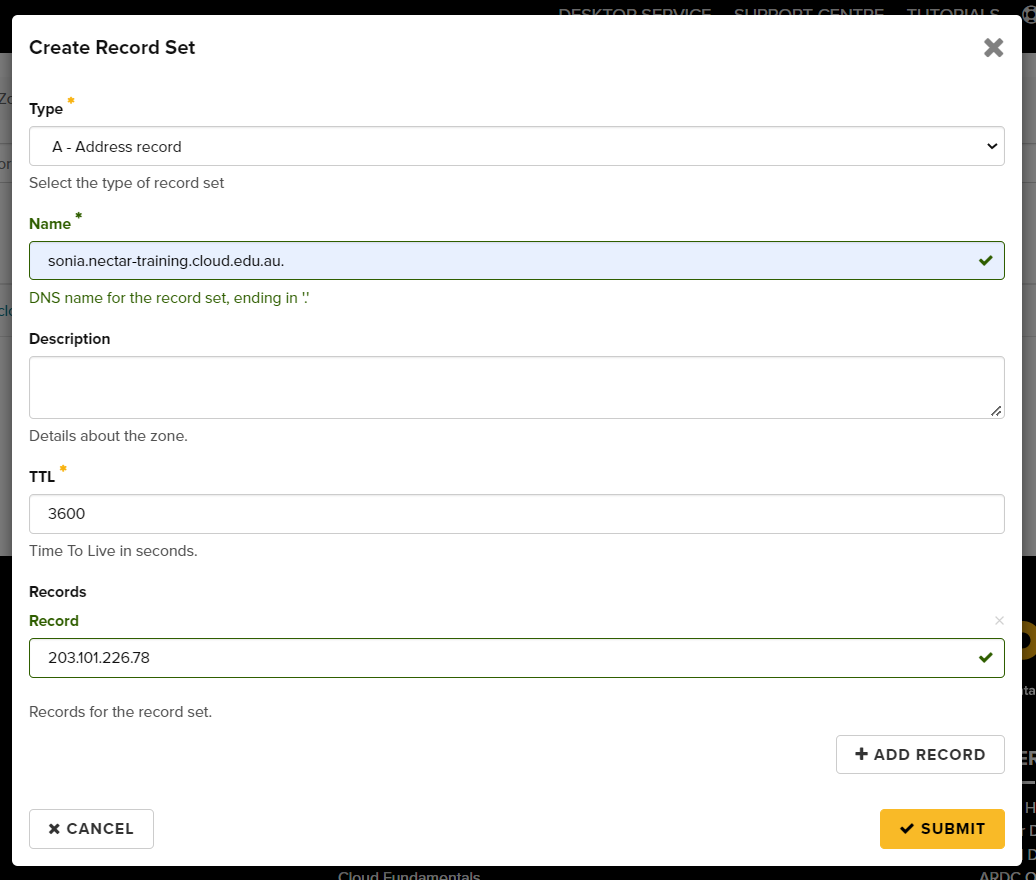
You can use the Nectar dashboard to create a new DNS record for an instance in your project. Navigate to Project -> DNS -> Zones, then select Create Record Set. The Create Record Set form will open so you can configure the new record set.

Complete the following fields then click Submit:
- Type is A - Address record for a new DNS name.
- Name is your new DNS name. The DNS name must end with the DNS zone name, including the last ‘.’.
- Records is a list of the instance IP addresses. You typically only need to add one record using the primary IP address of the instance (from Project -> Compute -> Instances on the dashboard).
Once complete, if you click the domain you set the record for, you should see it in the list.

To create a DNS record for your instance using the OpenStack command line:
$ openstack recordset create <zone name> <hostname you choose> --type A --record <ip addr>
For example:
$ openstack recordset create myproject.cloud.edu.au. my-name --type A --record 203.101.225.247
Check that the record was created correctly using:
$ openstack recordset list myproject.cloud.edu.au.
+------+---------------------------------+------+-----------------+--------+--------+
| id   | name                            | type | records         | status | action |
+------+---------------------------------+------+-----------------+--------+--------+
| ...  |                                 |      |                 |        |        |
| <id> | my-name.myproject.cloud.edu.au. | A    | 203.101.225.247 | ACTIVE | NONE   |
| ...  |                                 |      |                 |        |        |
+------+---------------------------------+------+-----------------+--------+--------+
To check that the DNS name is working, you can try accessing the instance with SSH. For an Ubuntu Nectar instance try:
ssh -i <keyfile> ubuntu@<instance-name>.<project-name>.cloud.edu.au