Database
This tutorial is part of the Cloud Expert Series.
Back to Cloud ExpertCategory: Advanced
Difficulty: 4 out of 5
Duration: 91 minutes
1. Overview
2. Create and launch a Database Instance
3. Accessing a Database Instance
4. Backup and Restore a Database Instance
5. Managing Database Users
6. Creating and Deleting Databases
7. Managing Database Logs
8. Advanced Database Instance Management
9. Using the command line
10. Next Steps
Find a mistake? Let us know the issue here.

Creating and Deleting Databases
As we saw earlier, you can specify a list of initial databases to create when launching a new Database Instance. The Dashboard provides a simple way to add more databases, or remove them. (You can also create and delete databases using the database’s native tools.)
Create a new Database
In this exercise, we are going to create a new database called tutorial_new in an existing Database instance.
- Navigate to the
Project/Database/Instancespage. - Click the database instance name
tutorial. - Click the
Databasestab.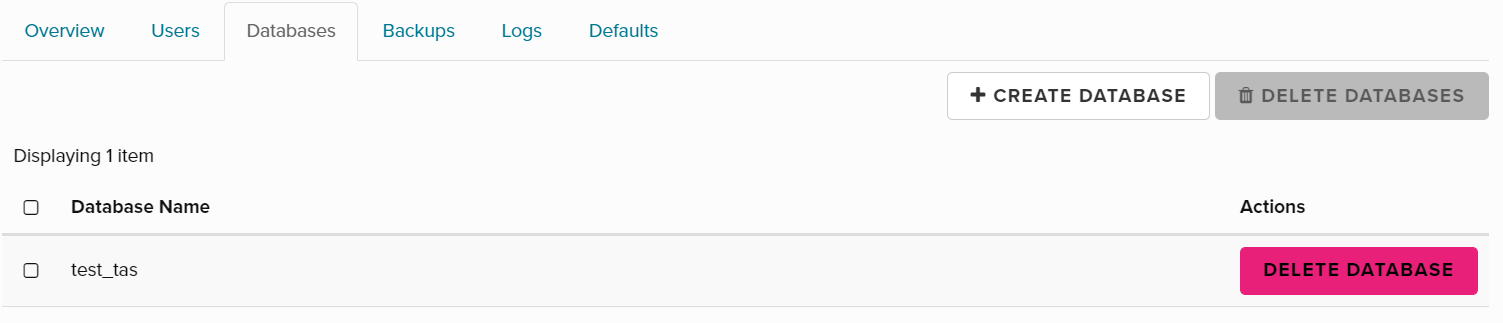
- Click
Create Databasebutton - Enter
tutorial_newin theNamefield.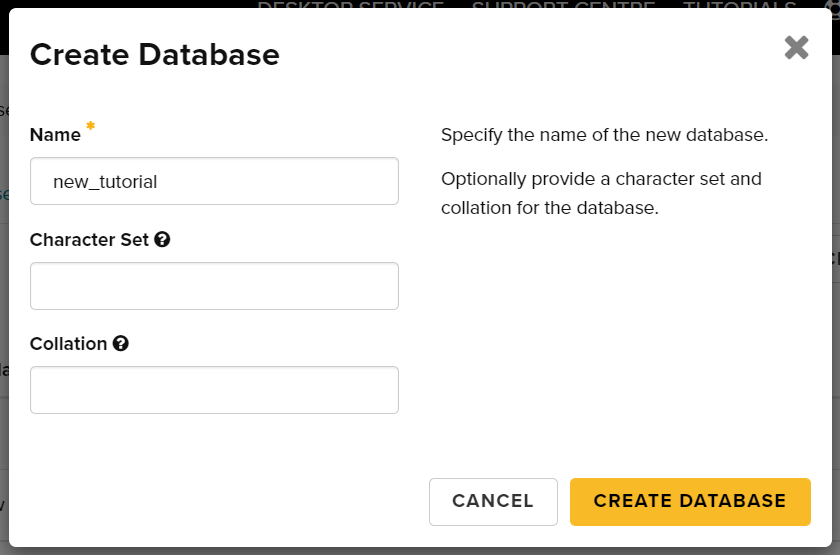
- Click
Create Databasebutton. - You should see database
tutorial_newhas been created and is listed in the page.
Delete an existing Database
In this exercise, we are going to delete the tutorial_new database that we just created.
- Navigate to the
Project/Database/Instancespage. - Click the database instance name
tutorial. - Click the
Databasestab. - Find the row for the
tutorial_newdatabase which we created above. - Click the
Delete Databasebutton. - In the
Confirm Delete Databasedialog, click theDelete Databasebutton. - The page will refresh to show that the database has gone.