Database
This tutorial is part of the Cloud Expert Series.
Back to Cloud ExpertCategory: Advanced
Difficulty: 4 out of 5
Duration: 91 minutes
Find a mistake? Let us know the issue here.

Create and launch a Database Instance
Launch a MySQL database
- Log on to the Nectar Dashboard and ensure you’re working in the right project (Use the project selector on the top left-hand side)
- Navigate to the
Project/Database/Instancespage - Click the
Launch Instancebutton to start the Create Database Instance dialog. - Select the appropriate Availability Zone from drop down list and supply the name
tutorialfor theInstance Namefield. Select the latest of version of MySQL in theDatastoredrop down list.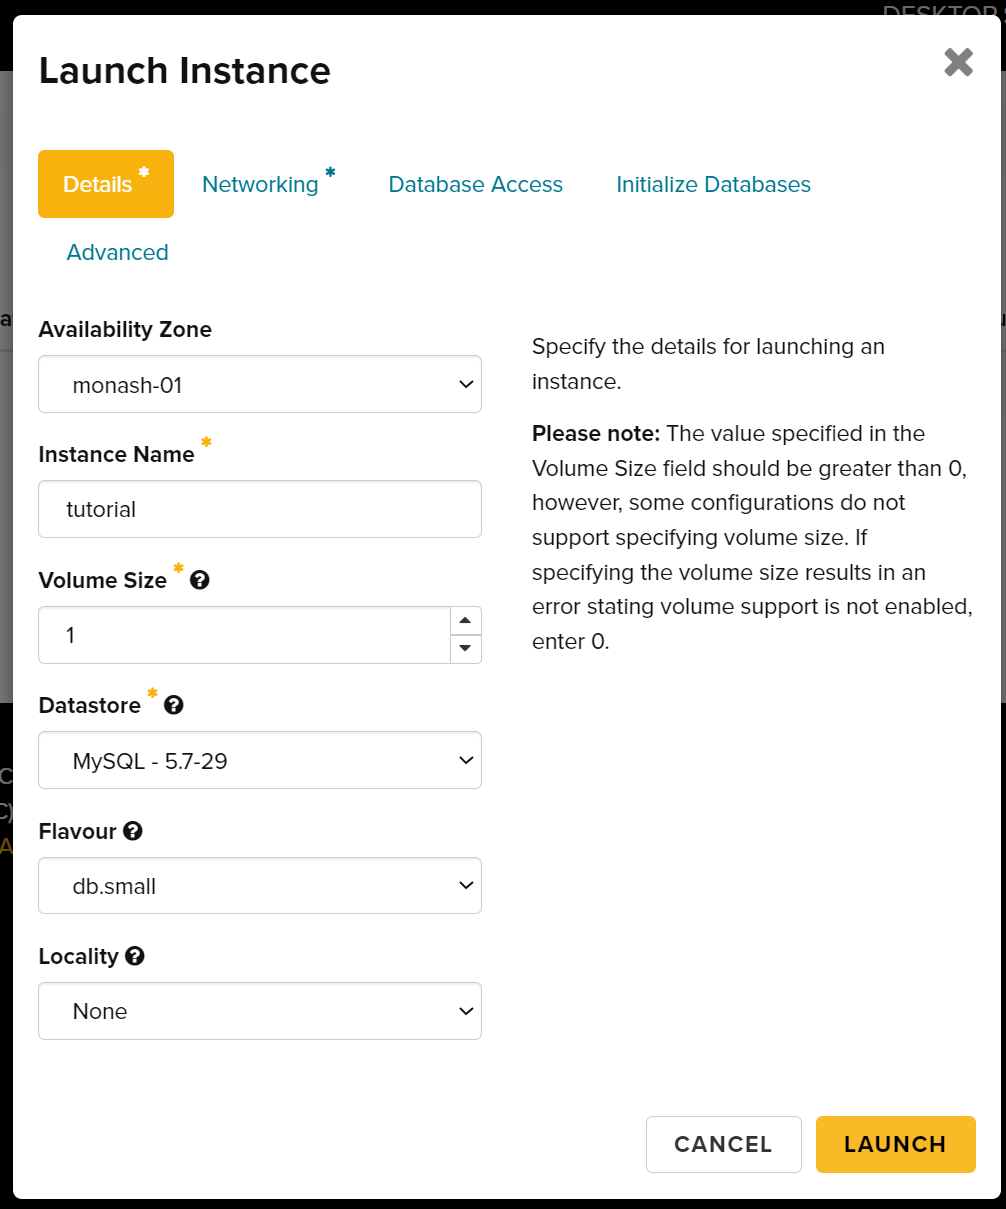
- Click the
Initialize Databasestab. Entertutorialin theInitial Databasesfield. EnteradmininInitial Admin Userfield. Enter a strong password in thePasswordfield.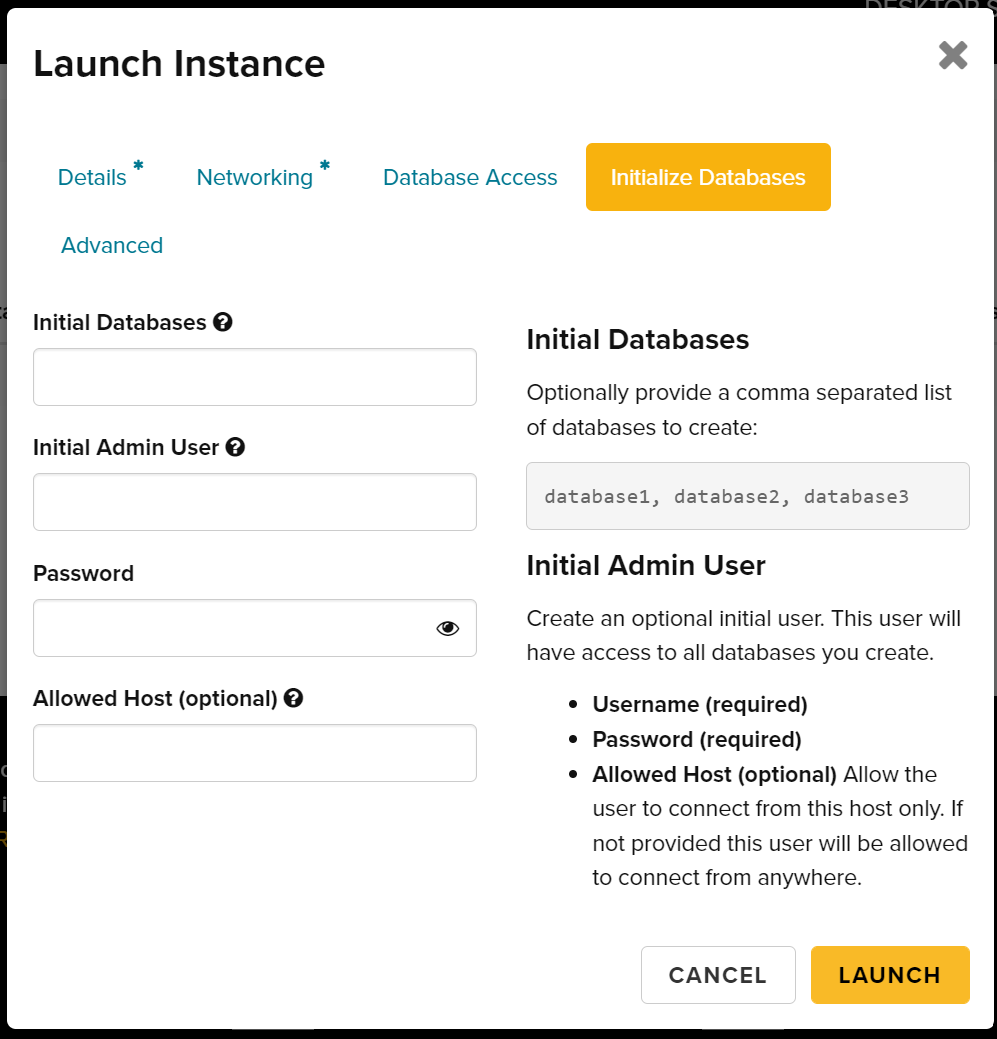
-
Click the
Access Databasetab. Here, you can add a specific IP or range of IP addresses which can only access your database instance. If it is left as the default (0.0.0.0/0), it will be exposed to the entire Internet.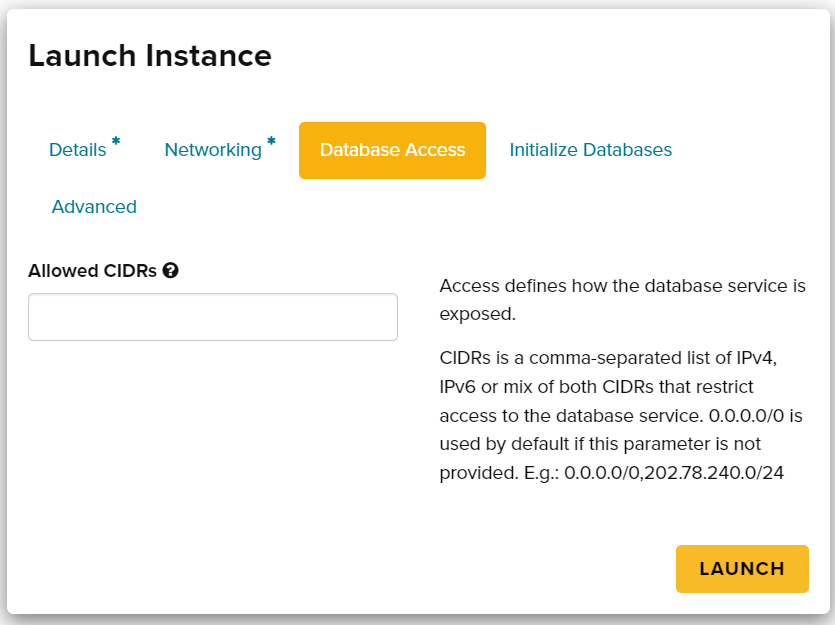
Access points?
If you restrict your database instance, remember to think about the access points you will require. It could be your individual computer, another cloud instance you are using and/or your University network IP ranges. - Click
Launchbutton. - Once the building process is finished, you should see your instance become
Active. It is now ready to use.
Only allow the V.I.Ps!
For security reasons, we recommend that you either provide a specific host IP address in the Allowed Host field to limit access to your database itself, limit where the database is exposed to via CIDR, or launch your database instance on a private network. See the Advanced Networking tutorial for more information.
In the next section, you will learn how to create and restore database backups.