Volume Storage
Category: Beginner
Difficulty: 1 out of 5
Duration: 21 minutes
Find a mistake? Let us know the issue here.

Increasing your Volume Size
🚨Warning🚨
The process requires some system administration skills and there is a risk that you can lose your data, so make sure you have a backup. It is also recommended that you try it out on a small test volume first. If unsure you can always contact the Help Desk as well.
Pre ride safety checks
Our instructions below will only work for Volumes that are not partitioned, and of a particular format type. Thus, it is best first check what state your volume is in, using commands below.
lsblk -o NAME,FSTYPE,TYPE
Can I proceed?
If the results don’t show your volume as a disk for TYPE and ext4 for FSTYPE in the output, these instructions will not work. Best to call in the experts to help. You can contact the Nectar Help Desk or your local IT team.
Checking volume quota
Now, we can check if you have Volume quota available. To check your available quota in the Dashboard, click the Compute tab, then the Overview sub-tab. The pie chart for Volume Storage shown will show your quota.
If you need more quota for this, you can view our Manage your Allocation article.
Note
These instructions uses a combination of the Command Line and the Dashboard.
Ensure you are connected to the instance where your Volume is connected, using SSH on the Command Line. Then use the df command below to see the list of disks and their size. Take note of your volume’s name.
df -h
🚨Beep Beep Backup!🚨
Before proceeding any further, please ensure you have a backup of any important data on your Volume.
Then, enter this Command below, which will unmount your Volume. Adjust the command as necessary for the name of your Volume.
sudo umount /dev/vdb
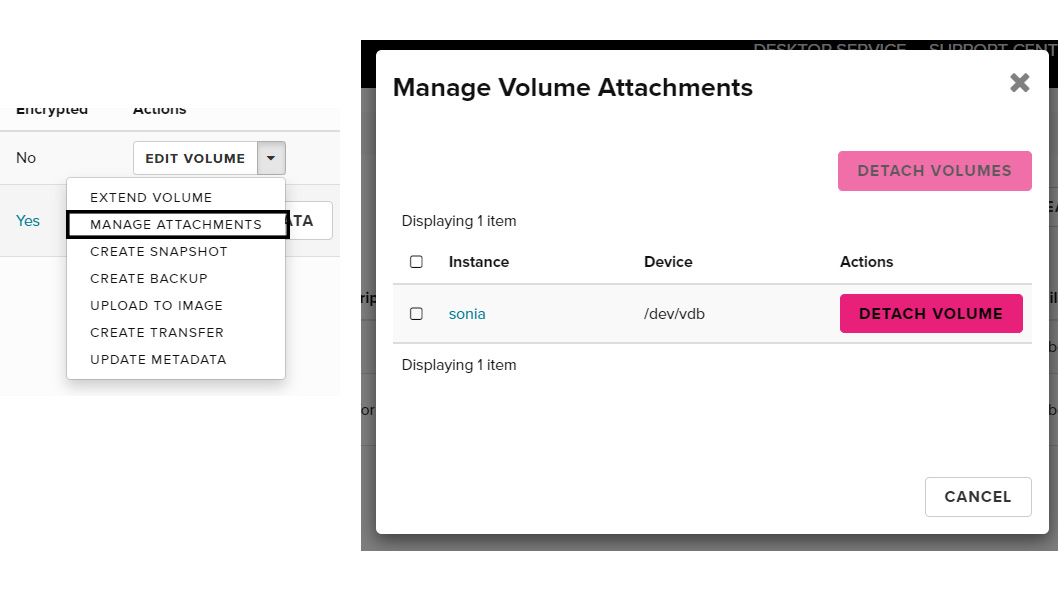
Now, you can go to the Dashboard, to the Volumes page (Overview, Volume, Volumes), select Manage Attachments, and then Detach.
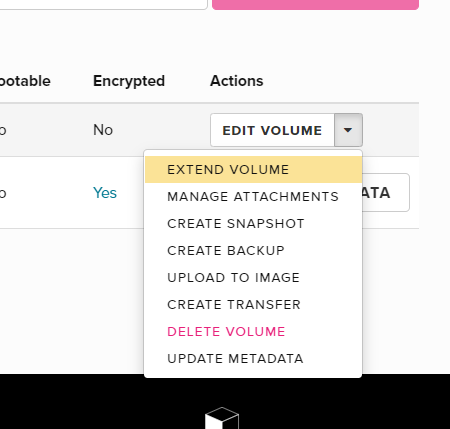
Now we can increase the size of the volume, by finding the Extend volume button on the dashboard.
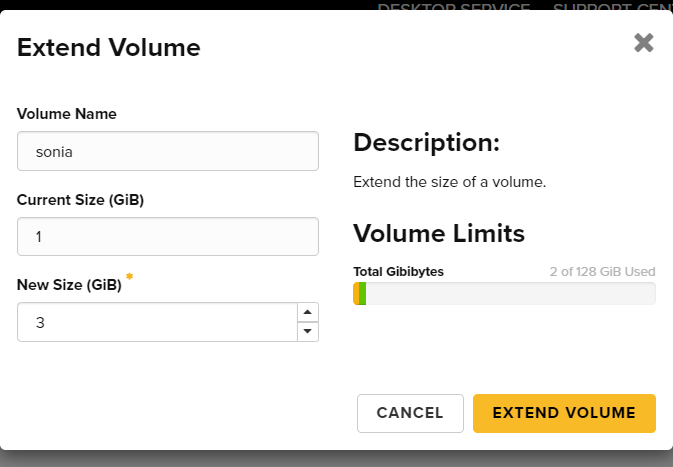
In the window that pops up, enter what size you would like to make the Volume, and click Extend Volume.
Return to your instance ssh login session and re-mount the volume.
sudo mount /dev/vdb /mnt/pvol
Once remounted, you can see that the volume filesystem size is still the same, before resizing it.
$ df -h
You should now be able to extend the filesystem to match the new volume size. We will use the resize2fs command. To resize the filesystem using resize2fs, first un-mount the volume.
$ sudo umount /dev/vdb
Then we perform a file system consistency check.
sudo e2fsck -f /dev/vdb
Resize the filesystem to match the volume size.
sudo resize2fs /dev/vdb
Re-mount the volume and check that the filesystem size matches the new volume size.
sudo mount /dev/vdb /mnt/pvol
$ df -h
Your volume should appear in the list with the new size!
Great Job
Your volume’s extra storage is now ready!