Virtual Desktop Service
Category: Beginner
Difficulty: 1 out of 5
Duration: 20 minutes
Find a mistake? Let us know the issue here.

Log in and setup
Go to the Virtual Desktop Service home page.
You can log in using your AAF or Tuakiri credentials (your institutional email address and password).
-
Click the
Sign Inbutton.
-
Select the AAF Identity Provider if your institution is Australian, or Tuakiri for New Zealand. Follow the prompts to log in. You will also need to read and agree to the Terms of Service.

-
Click the
Create Workspacebutton.
-
This will lead to the Workspace proposal page. Here you need to fill in some basic details about your intended use of the Virtual Desktop Service. This includes
Title,Project Description,Chief InvestigatorandField of Research Codes. Once this is complete, clickSubmit. Note: You can edit your Workspace details after submission.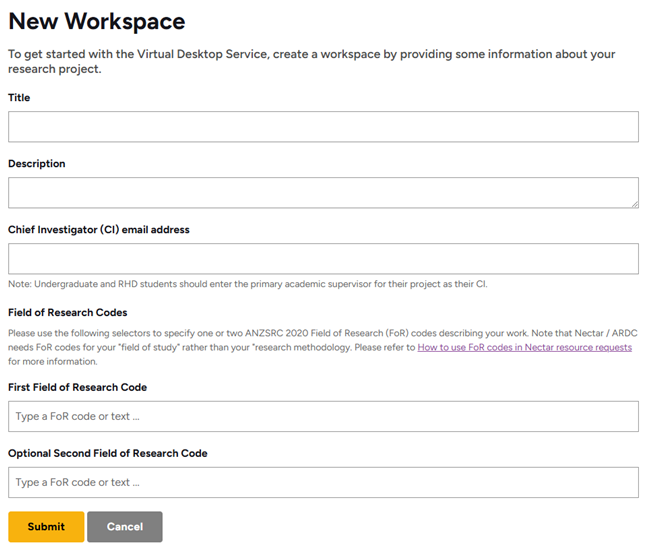
-
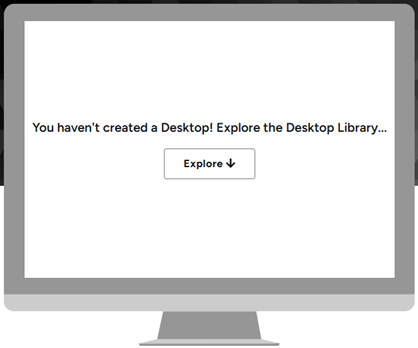
Once successful, you will see a message that you haven’t created a Desktop.
Setting the time zone
Before creating a Virtual Desktop, let’s set the timezone.
-
Click on your email address in top right corner and select
Profile.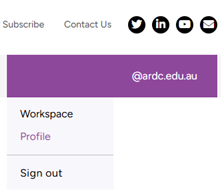
-
Select your desired timezone using the dropdown box, then click
Save.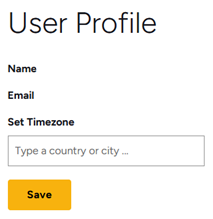
Configuring the Desktop
-
To get back to our Desktop home page, click the
Virtual Desktop Servicetext in the top left corner. -
Click
Exploreor scroll down to view the Desktop Library. -
Select from the Operating Systems listed. For this tutorial, we will use
Ubuntu 20.04 (Focal). ClickView Details. Information about the Operating system will be displayed, including the default size, boost size, features, and what this desktop is great for.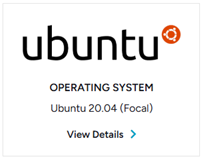
-
Once you have selected your desired Operating System, click the
Create Desktopbutton. If you wish to consider other options, follow the link at the bottom of the page to exploreother desktops.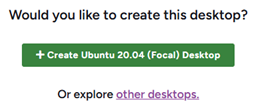
-
If prompted to select your preferred availability zone, then select
Default zoneto let the system choose. Some Desktops will have an availability zone preselected. ClickCreate.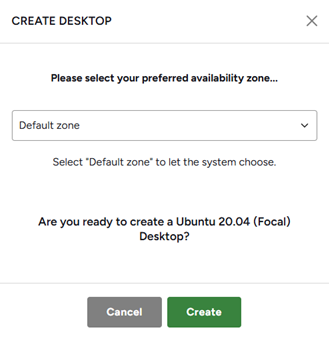
-
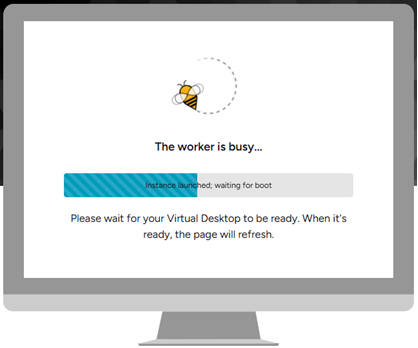
You should now see the magic happening, with a progress bar showing your Virtual Desktop being built. This may take some time, so please be patient.
-
Once it’s complete, you will see a screen with the Operating System chosen, and buttons to
Open Desktop,Reboot,Shelve,Extend,Boost, andDelete.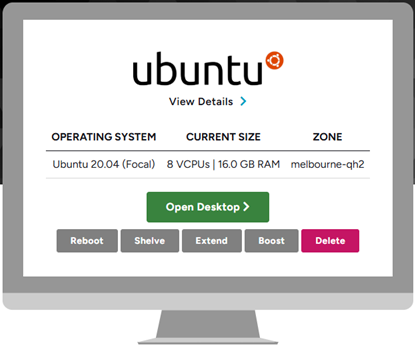
Desktop is ready to go!
Well done. You’ve got your Virtual Desktop switched on, in the next tutorial we will open and navigate the desktop itself as well as do some basic tasks.