Snapshots
Category: Beginner
Difficulty: 1 out of 5
Duration: 15 minutes
Find a mistake? Let us know the issue here.

Creating an instance snapshot
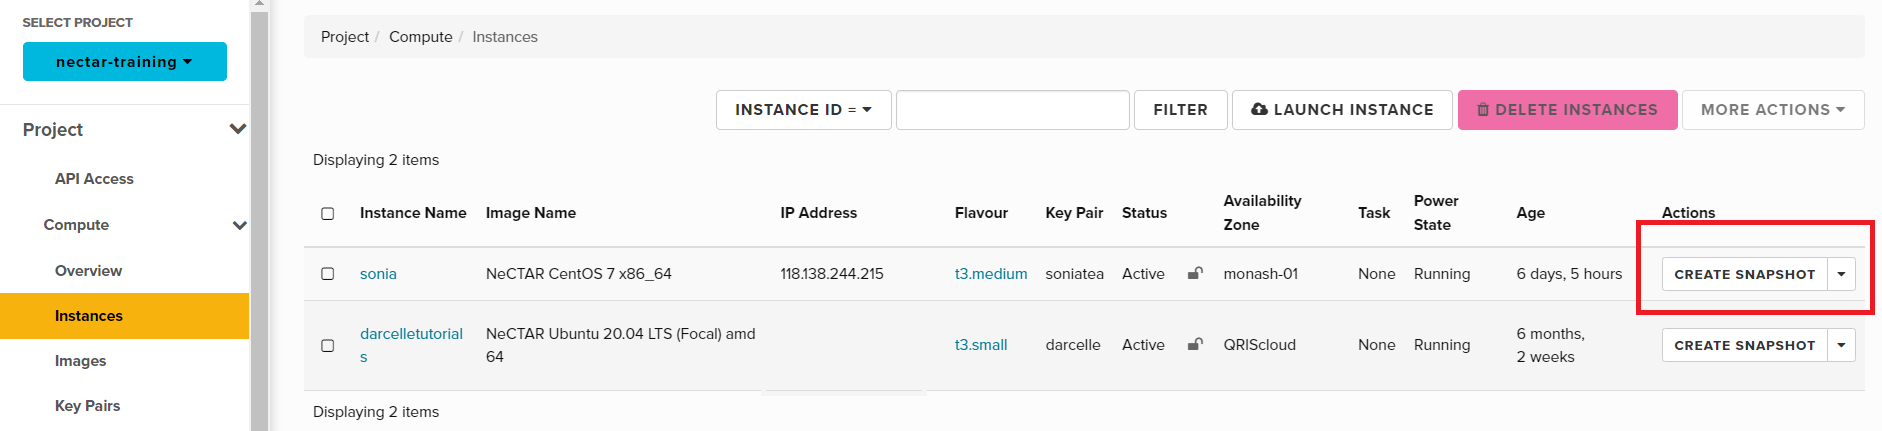
Log on to the Nectar Dashboard and navigate to the Project, Compute, then Instances page.
Locate the instance you wish to snapshot and click the Create Snapshot button on the right hand side of an instance from the Actions drop down list.
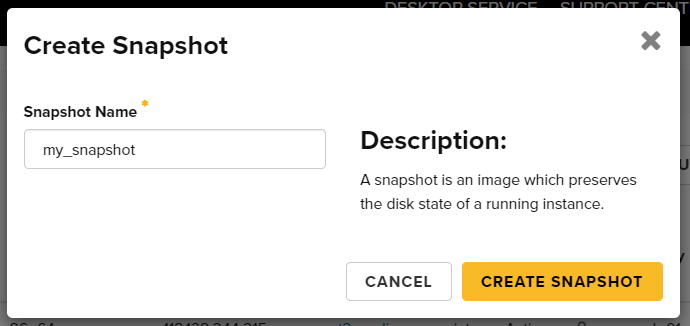
At the Create Snapshot dialog window, enter a name for your new snapshot, then click the Create Snapshot button to begin the snapshot process.
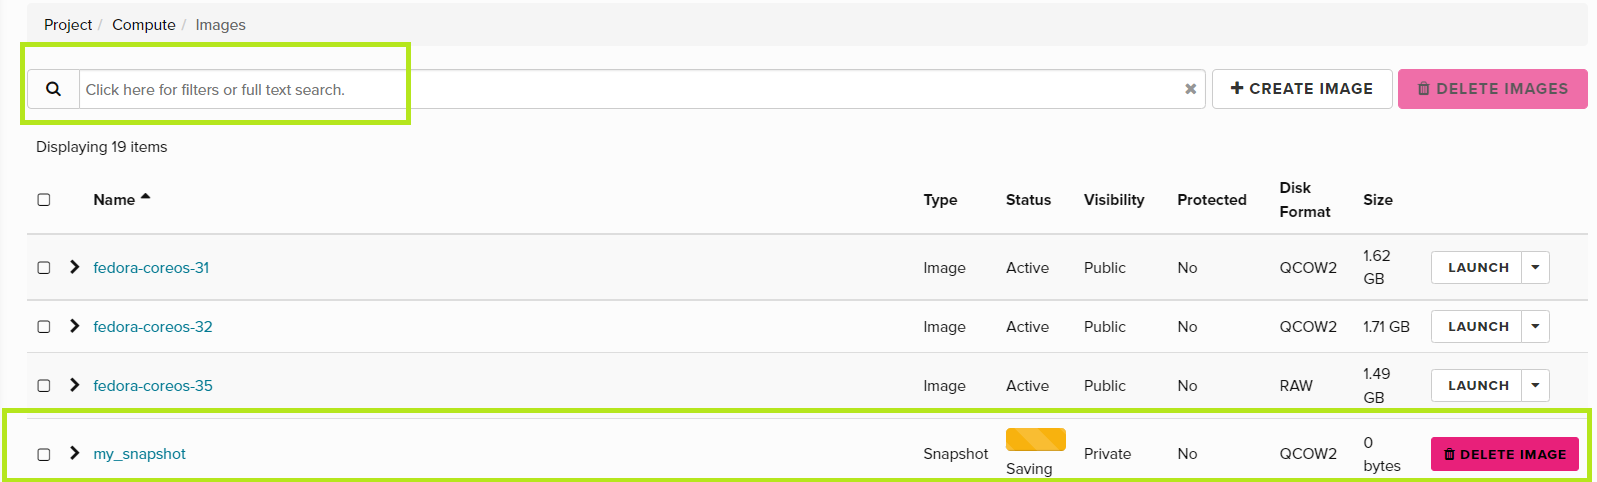
You will then be redirected to the Images tab of the dashboard, which lists your images and snapshots.
To see your snapshot, you may need to search for it using the search bar, or navigate to the next page.
Note
Instance snapshots do not include the state of the secondary ephemeral disk, or any volumes, even if they are currently mounted.
Filesystem consistency
It is possible for the snapshotted filesystem to be in an inconsistent state if, for example, data was currently being written to the disk at the time the snapshot was performed.
Images based on the Nectar official images include an agent which ensures the filesystem is in a consistent state before a snapshot is performed, but other images may not support this.
In those cases, you are encouraged to pause or stop your instance before performing the snapshot.