Security groups, the absolute basics
This tutorial is part of the Cloud Starter Series.
Back to Cloud StarterCategory: Beginner
Difficulty: 1 out of 5
Duration: 15 minutes
Find a mistake? Let us know the issue here.

Applying Security Groups
Security Groups are applied to Virtual Machines to allow them to receive network traffic. Typically you apply Security Groups when you Launch your VM, but you can add security groups to your running VM at a later time too; Or indeed remove security groups from your VMs.
Changing Rules on Existing Security Groups
You can also add Rules to- or remove rules from existing Security Groups. You should be mindful that this will affect all VMs that use the group, including pre-existing VMs.
Applying a Security Group at Launch
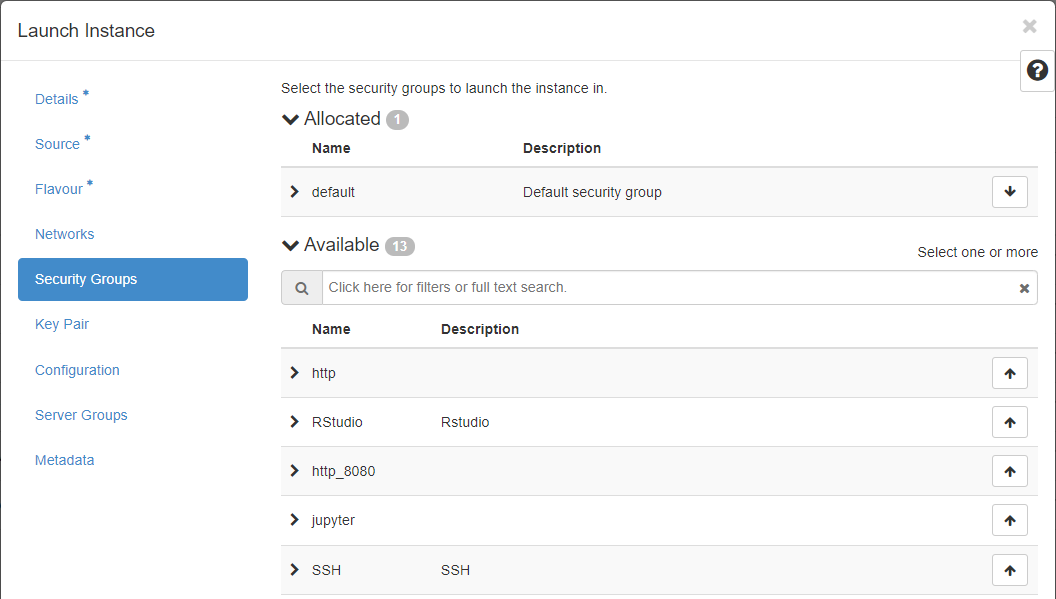
When you launch an instance using the Nectar dashboard, the Launch Instance dialog will guide you and will ask you to apply one or more security groups. You will need to have created those group before the following the launch dialog.
Cloud Starter
If you’re following the Cloud Starter Series: you’ll learn about Launching and the Dialog in our Launching Virtual Machines tutorial
Applying a security group on a running instance
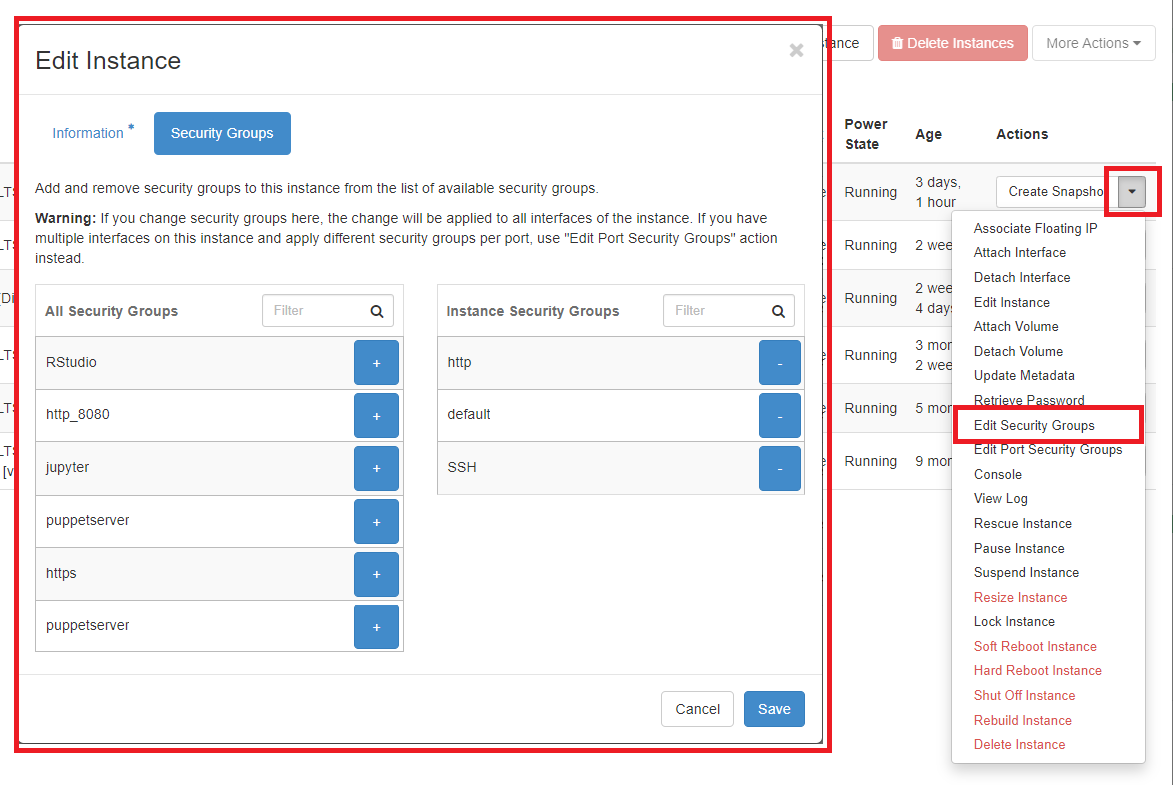
If an instance is already running you can add security groups to the running instance to make it respond to additional network traffic, or remove security groups when they’re no longer required. You do this using the option “Edit Security Groups” in the Action button menu for your instance. This will launch the Edit Instance dialog as shown here.
Cloud Starter
If you’re following the Cloud Starter Series: you’ll learn about more about Changing things on your instance in our tutorial Rebooting, Deleting, Rebuilding, Resizing