Sharing your Virtual Machine
Category: Intermediate
Difficulty: 3 out of 5
Duration: 40 minutes
Find a mistake? Let us know the issue here.

Sharing access for SSH
You can allow other users to securely access an instance you have created, via SSH (Secure Shell).
To do this, you add the other user’s public key to a specific file in your Instance. This will allow them to use their corresponding private key, to then access the Cloud Computer you have made. Sort of like if you added another lock to your front door, which matched a corresponding key for someone else to access your house. Of course that’s not how it’s usually done for doors, but hopefully this helps understand the Cloud side of things!
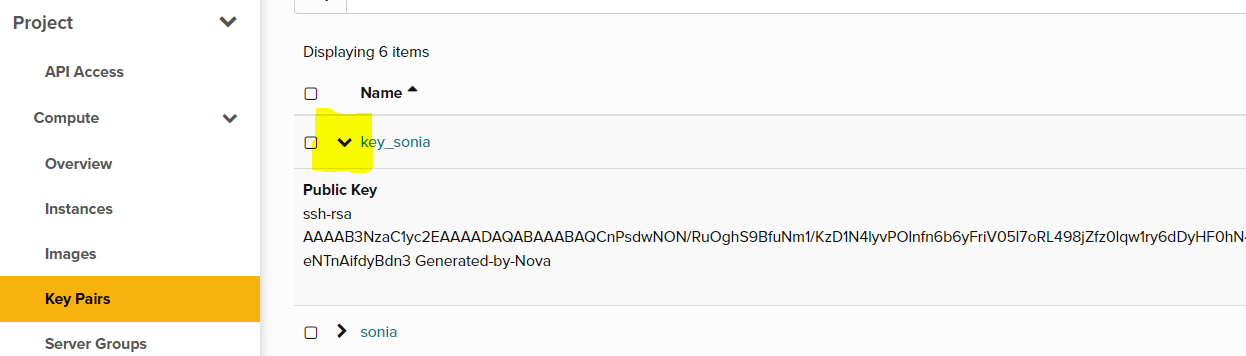
Finding the public key
First ask your colleague for their public key. If they generated their key-pair via ssh-keygen in the Command Line, they should have a <something>.pub file in their .ssh folder (it would be whatever they specifically named it, and the .ssh folder should be in their home directory on their local computer). They can navigate to that via their file explorer, or via the Command Line using cd ~/.ssh, then open the file with nano to copy/paste.
If their key was generated via the Dashboard, go to the Key Pairs page. For the key to be shared, select the black arrow. Then copy + paste the text that appears, and place it into a text file, and save it with the key name and the .pub extension (example: yourkeyname.pub)
Not all sharing is caring
Make sure your colleague double checks it is the public key they are sharing and not the private key! The private key in your ~/.ssh folder (from your local computer) should never be shared!! Public key files will always have the .pub extension.
Adding the Public Key to your Cloud computer
Now, access your Instance via SSH.
You are going to navigate to the .ssh folder on your instance:
cd ~/.ssh
Then open the Authorised Keys file using a text editor of your choice. In this example, we are using Nano.
nano authorized_keys
In the file that opens, you then need to paste the contents of your colleagues Public Key and save the file, for Nano, we can use ctrl + s to save it. Ensure each public key you add is on a new line in the file.
Important Flight Test!✈️✈️✈️
Before moving any further, let’s double check you still have access to your instance as normal. Open up another Terminal/Powershell window, and enter the necessary command. If you get an error, go back to your original terminal window, and double check you haven’t altered your own Public Key in the authorized keys file. This must be fixed before exiting the SSH session, by double checking your public key text has not been altered. If this is not fixed before closing the session, you will lose access to your instance all together, and it cannot be fixed. There are no resets here!
🚨🚨🚨 Did you check? 🚨🚨🚨
This is our final warning, make sure you open a separate Terminal window and check you can still access your instance. Not doing this could mean you lose access all together! See the above flight test.
Success!
Your colleague should now be able to access the Instance via SSH, using the standard command, default username and their Private Key name! Be sure to let them know the IP address of your instance for access.
Hurdles happen!
Of course, occasionally errors can happen. We do have an article for troubleshooting SSH connection problems here. Also, you can always contact our Help Desk via our Support Site.