Kubernetes
This tutorial is part of the Cloud Expert Series.
Back to Cloud ExpertCategory: Advanced
Difficulty: 3 out of 5
Duration: 60 minutes
Find a mistake? Let us know the issue here.

Administering a Cluster
Creating the kubectl config
kubectl is the command line client used to control a kubernetes cluster. Kubernetes uses a separate authentication mechanism from OpenStack (Keystone). Since OpenStack already knows who we are, we can use it to generate a kubectl config file that includes credentials to authenticate us to Kubernetes.
-
Create a new directory and
cdto it;mkdir mycluster cd mycluster -
Use the
openstacktool to generate the config file for kubectl:openstack coe cluster config mycluster export KUBECONFIG=/home/jake/temp/coe/mycluster/config -
Set the KUBECONFIG environment variable used by copy-and-pasting the
export KUBECONFIG=...line output by the above to the shell prompt:export KUBECONFIG=/home/jake/temp/coe/mycluster/config echo $KUBECONFIG /home/jake/temp/coe/mycluster/config
Using kubectl
-
Use kubectl to see if all your service pods in kubernetes are set up correctly. All the pods in the
kube-systemnamespace should have statusRunning. For example:kubectl get all --all-namespacesNAMESPACE NAME READY STATUS RESTARTS AGE calico-apiserver pod/calico-apiserver-79dbf75bfc-997sh 1/1 Running 0 45d calico-apiserver pod/calico-apiserver-79dbf75bfc-wjqsz 1/1 Running 0 45d calico-system pod/calico-kube-controllers-5c7ffcfbf9-q75rz 1/1 Running 0 45d calico-system pod/calico-node-49dsv 1/1 Running 2 (45d ago) 45d calico-system pod/calico-node-q69tj 1/1 Running 0 45d calico-system pod/calico-typha-6c874f96b5-7w7pv 1/1 Running 0 45d calico-system pod/csi-node-driver-hl9jm 2/2 Running 0 45d calico-system pod/csi-node-driver-jqwrv 2/2 Running 0 45d kube-system pod/coredns-7c65d6cfc9-fzqmp 1/1 Running 0 45d kube-system pod/coredns-7c65d6cfc9-n7l9p 1/1 Running 0 45d [output truncated]
Using the web interface
Magnum used to ship its own Web UI Dashboard, with Magnum installing it by default. This is now deprecated and no-longer maintained, headlamp is now the recommended application for this.
Headlamp gives you a browser-based view of your cluster’s pods, deployments, services, logs and more.
Installation instructions can be found on the Headlamp site.
Upgrading a cluster
You can upgrade your cluster to a newer Kubernetes version from the Nectar Dashboard. The upgrade is a rolling upgrade, meaning nodes are replaced one at a time so your cluster keeps running while it upgrades.
-
Go to Project > Container Infra > Clusters. Find your cluster in the list, open the dropdown menu next to Manage Node Groups and select Rolling Cluster Upgrade.

-
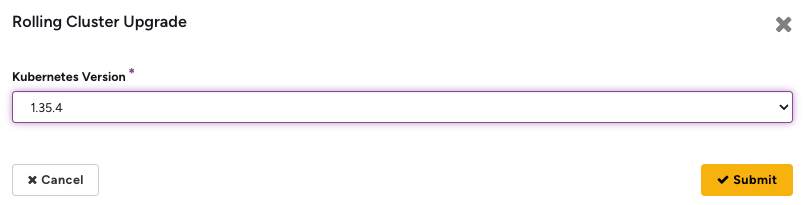
In the Rolling Cluster Upgrade dialog, select the Kubernetes version to upgrade to and click Submit. For example, a cluster running v1.34.7 can be upgraded to 1.35.4.
The cluster status changes to UPDATE_IN_PROGRESS while nodes are replaced,
and returns to UPDATE_COMPLETE when the upgrade has finished. You can watch
the nodes being replaced with kubectl get nodes.
Upgrade one version at a time
Kubernetes control plane upgrades on Nectar must proceed through each
nominated release in order; skipping versions is not supported.