Object Storage
This tutorial is part of the Cloud Two Series.
Back to Cloud TwoCategory: Intermediate
Difficulty: 3 out of 5
Duration: 60 minutes
Find a mistake? Let us know the issue here.

Accessing Object Storage via the Dashboard
In this lesson we will use the Nectar Research Cloud Dashboard to create an object storage container and upload some files to it.
What is a container?
A container is like a conventional file system folder: it holds objects in the same way that a file system directory holds files. The key differences are:
- A container can only hold objects. It cannot hold other containers. In other words containers are essentially flat. By contrast, a file system directory can hold other directories as well as files, symbolic links and potentially other things.
- An object is a member of exactly one container. By contrast a file in some conventional file systems can be a member of two or more directories, or even none.
What is a folder?
While we just said that containers are flat, Swift object storage does provide a way to simulate a hierarchy of objects. Each object has a name consisting of up to 1024 characters. (To be precise, names are 1024 bytes of UTF-8 encoded text.) If you use the “/” (slash) character in an object name, you can make the objects appear to be organized as hierarchical folders.
Container folders do not behave like conventional file system directories in the following respects when they are accessed via the Swift APIs:
- There is no “current folder” concept.
- You cannot easily list all of the objects in a folder. Your application needs to list them all and filter for names starting with the folder name.
- You cannot easily delete the objects in a folder, or do other operations at a folder level.
The Dashboard interface for object storage largely hides these issues, and allows you to “browse” the folder hierachy of your containers.
For more information on folders, see Pseudo-hierarchical folders and directories
Creating a container
- Logon to your Nectar Dashboard and ensure you’re working in the right project. (Use the project selector on the top left-hand side of the dashboard.)
- Navigate to the
Project/Object Store/Containerspage. This page shows any existing containers in the project. - Click on the
+ Containerbutton to start creating a new container.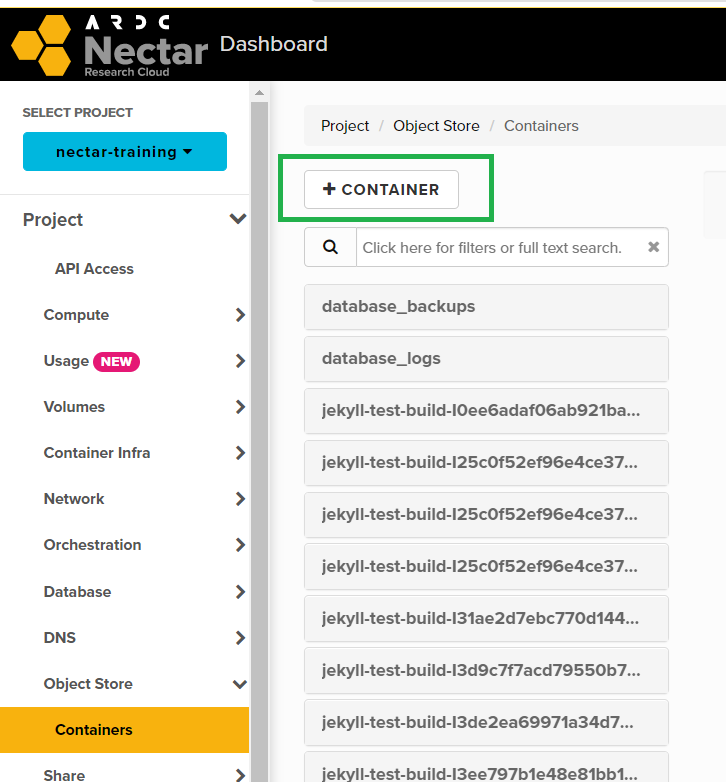
- Enter the container name in the
Container Namefield. - You can alter the default access for the container by
choosing
publicorprivateinContainer Access. - Click the
Submitbutton. You should shortly see that a new container has been created.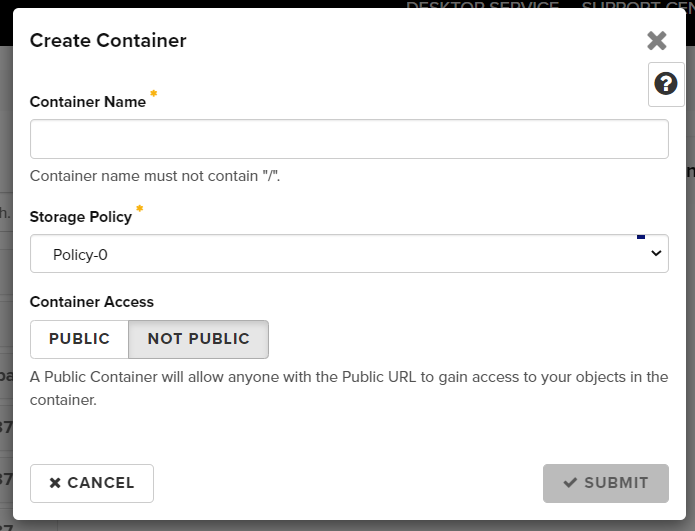
Creating a folder
To create a new folder in the newly created container:
- Login and navigate to the
Project/Object Store/Containerspage as before. - Find the container in the list and click on it to select it.
- Click on the container’s
+Folderbutton.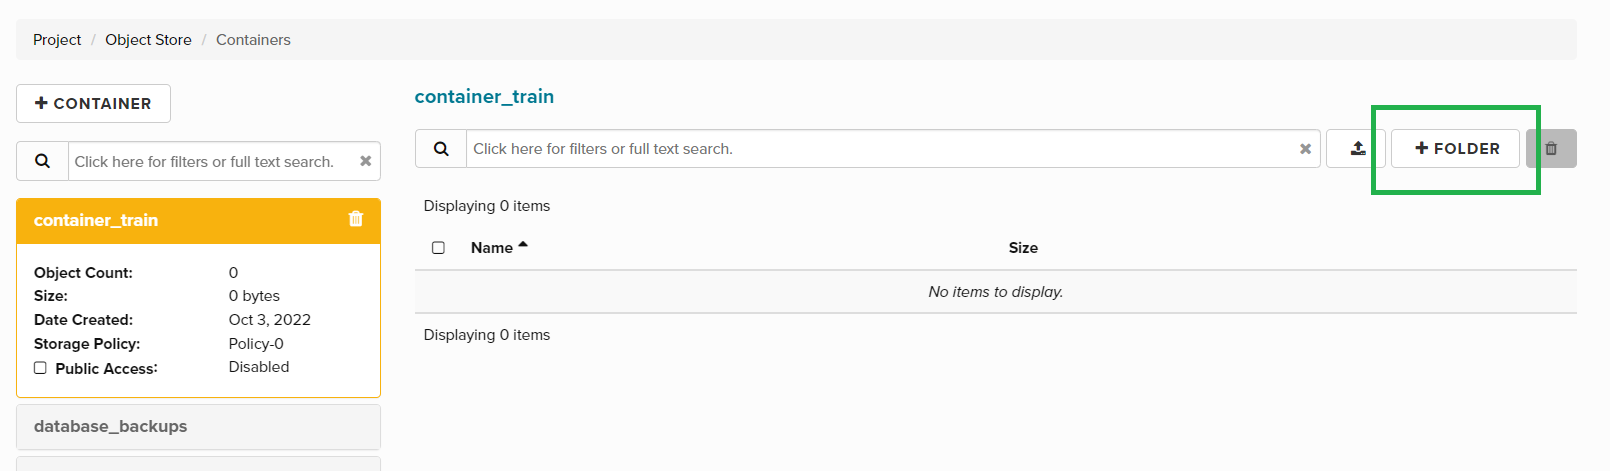
- Enter a folder name in the
Folder Namefield. - Click the
Create Folderbutton.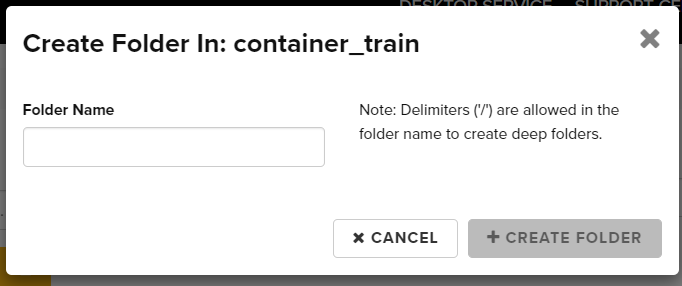
You can create folders within folders, and use the container browser to navigate the folder hierarchy.
Uploading a file
- Login and navigate to the
Project/Object Store/Containerspage as before. - Click to select the container to upload the file to.
- In the container page, click the
file uploadicon to start the file upload dialog.
- Click the
Choose filebutton, select a file on your local machine and click theUpload Filebutton.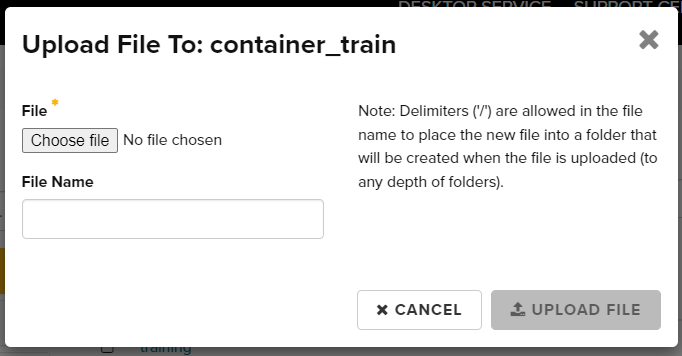
- You should shortly see that the selected file uploaded to the container.

Deleting a container and its contents
- Log on and navigate to the
Project/Object Store/Containerspage as before. - Click to select the container you want to delete to check its contents.
- You need to delete all objects in a container before you can delete
the container:
- either, use the
Deleteoption from the drop down menu for each object - or use the checkboxes to select all objects to be deleted and click
“trash can” button next to
+Folder. You will then be asked to confirm the operation.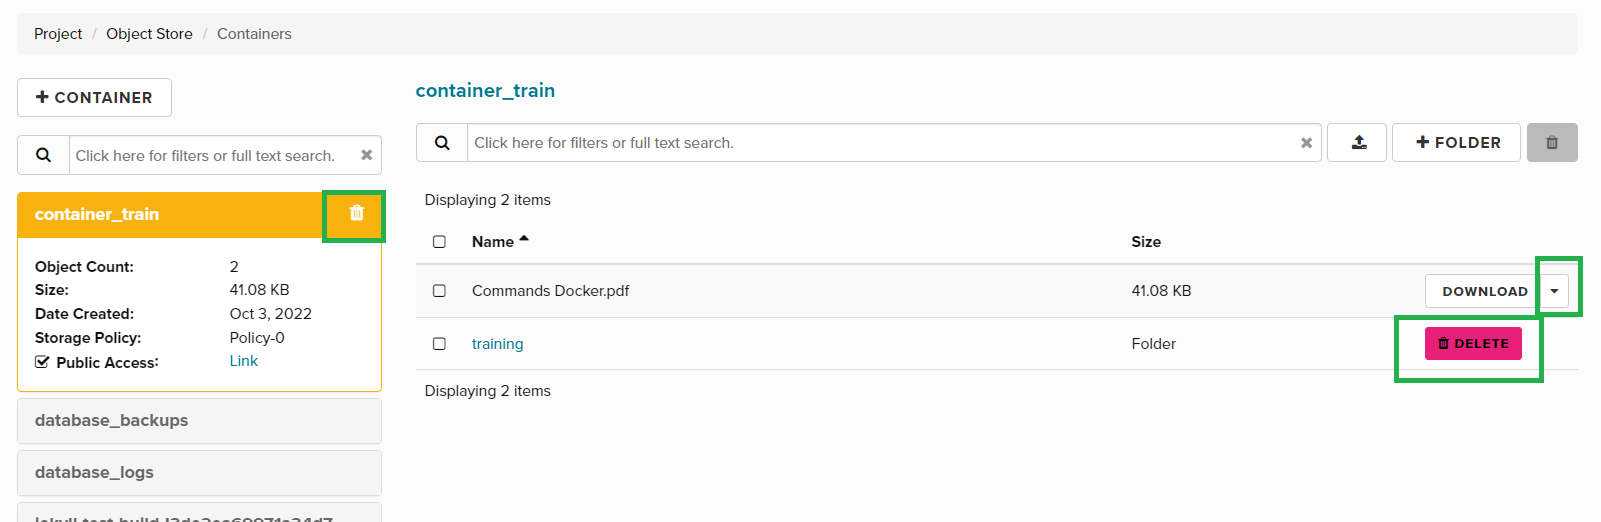
- either, use the
- To delete the emptied container, click the trash can button on the container’s entry in the container list.
Note
You cannot delete a container unless it is empty. However, you can delete
all files in a folder by selecting the folder and clicking the “trash can”
button next to +Folder.
Other operations on objects
- Log on and navigate to the
Project/Object Store/Containerspage as before. - Select a container and navigate to the folder containing the object.
- To view the object’s metadata, select
View Detailsfrom the dropdown menu. This will show you the object’s full name, the content type used when it was uploaded, its creation timestamp, size and MD5 hash. - To download an object as a file on your P/C, select
Downloadfrom the dropdown menu and use your browser’s “save file” control tell it where to put the downloaded file. - To copy an object to another container, select
Copyfrom the dropdown menu. You will be prompted for the destination container name and (full) object name in the destination container.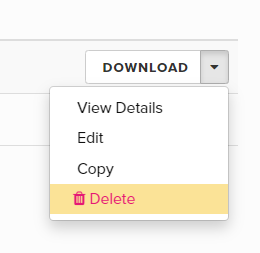
Make a container public
- Log on and navigate to the
Project/Object Store/Containerspage as before. - Select the container that you want to make public.
- Tick the
Public Accessoption to make the container public. - The “disabled” text will be replaced with a hyperlink named “link”. You
can use your web browser’s “copy link location” to capture the URL, send
it to other people.

Expiry and Deletion
When a Nectar project expires, all resources left behind are deleted after
a grace period.
If a container in the project is marked as “public”, it will not be
deleted automatically and will persist after the project has expired.