Simple container service
Category: Intermediate
Difficulty: 1 out of 5
Duration: 30 minutes
Find a mistake? Let us know the issue here.

Launch
To get started, you’ll need to launch the Docker Standalone Host first.
![]()
Navigate to Applications -> Browse Local, and you can optionally type Docker into the filter field to only show Docker related packages.
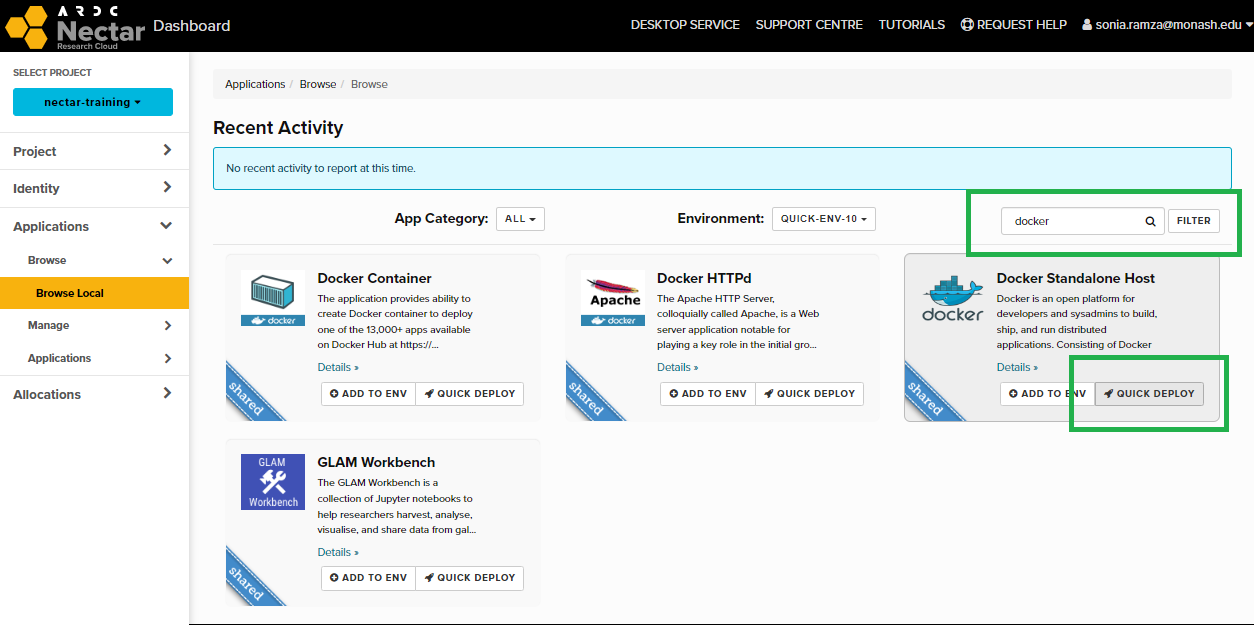
Click on the Quick Deploy button to create a new application environment with the Docker Standalone Host package. This package provides the necessary tools for running Docker containers on a Nectar compute instance.
The following dialog window will then appear.
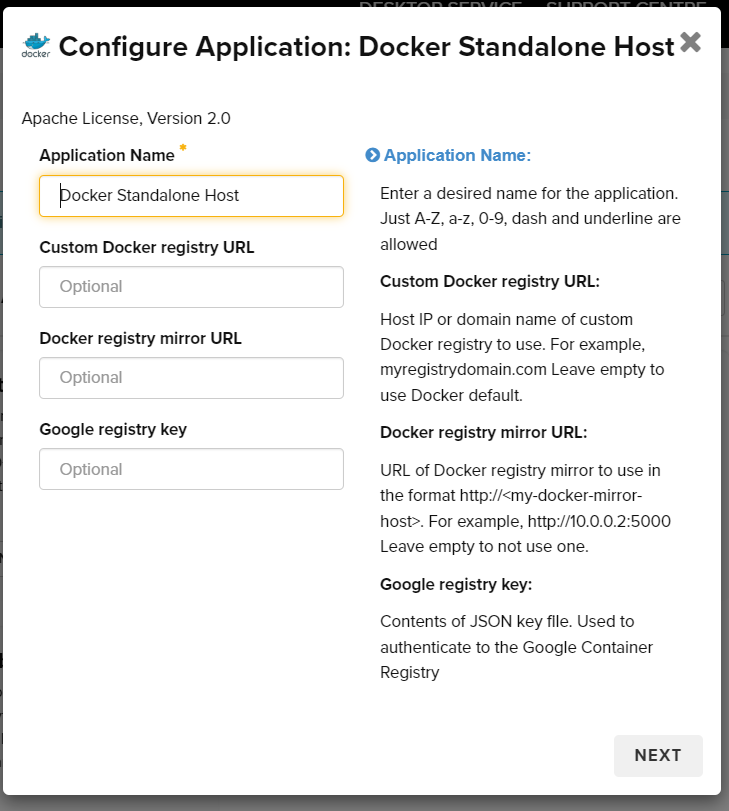
Here, you can optionally give your Docker Standalone Host a custom name or set some custom registry options. These might be useful if you have custom Docker registry you’d like to use, or if you use Google’s container registry service. For most users, it would be fine to accept the default here, and click Next.
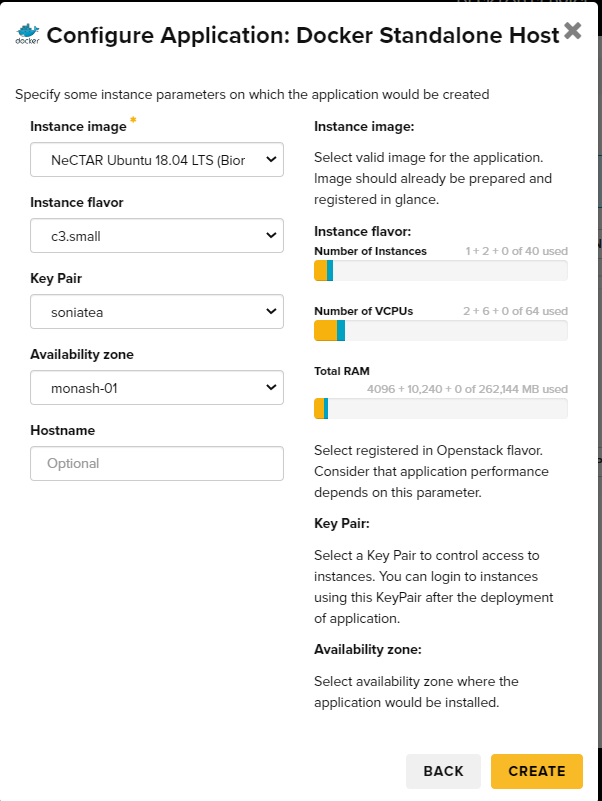
You can now customise your Docker compute instance. You will be required to select an Instance image, which currently is our official Nectar image based on Ubuntu 22.04 (Jammy).
You should specify here what instance flavour if most suitable for your requirements, a keypair (optional, but highly recommended for SSH access) and the Availability Zone your instances should launch in, then click Create.
If you’d then like the service to launch a container for you from the Docker Hub, you can add the Docker Container package to your environment.
![]()
Simply drag the Application and drop it into the blue rectangle labelled Drop Components here.
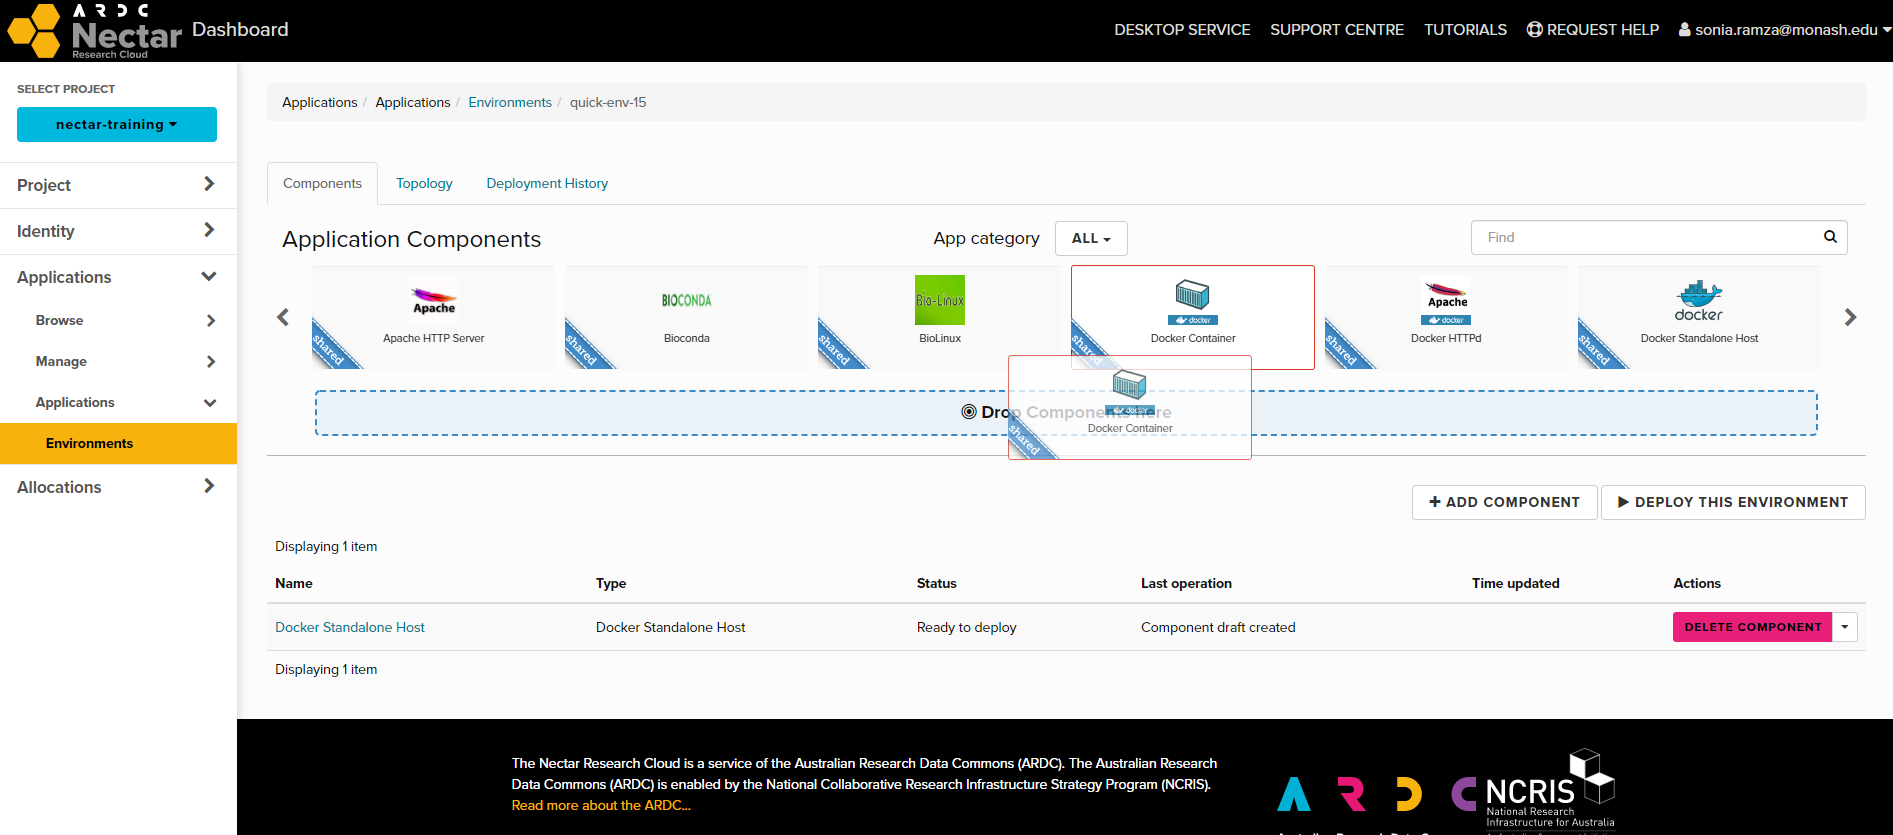
This will then bring up the settings for the Docker Container application.
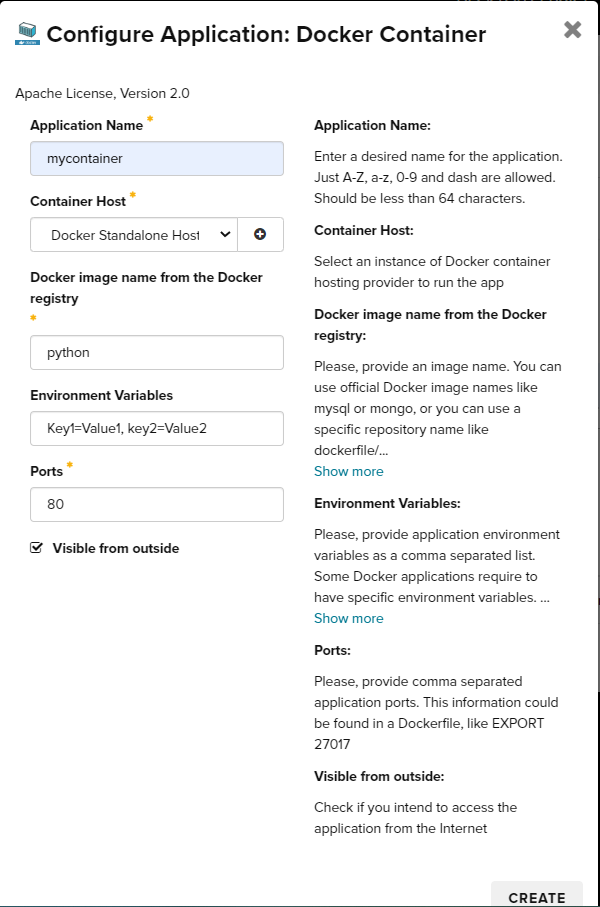
There are a number of important required fields at this step. The Application Name should be any name that is meaningful to you. The Container Host should have the Docker Standalone Host that we created in the previous step, which you should select. The Docker image name should be the label of the container from the Docker Hub you wish to run. You can search for available containers from the Docker Hub explore page.
Once you have a Docker container chosen, you’ll need to find which port(s) it listens on. This would generally be in the description of the container, but can be found from the Dockerfile of the container. It would be specified after the EXPORT option. If you do intend to connect to a service provided by the container, you could ensure the the Visible from outside is ticked. This will create Security Group rules for your instance for the given port.
Some containers may optionally take some configuration through Environment Variables. If this is the case, they can be specified here too.
Click Create to continue.
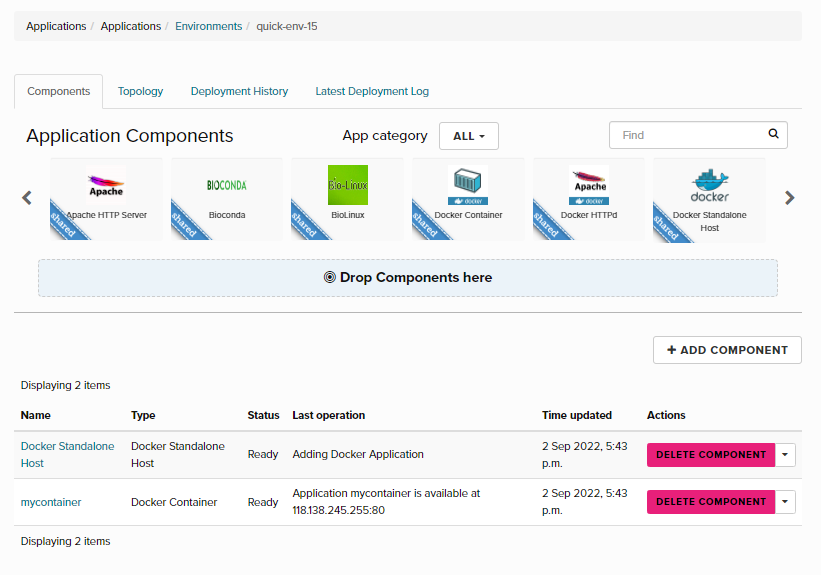
You should be back at your Application Environment page now. Click the Deploy This Environment button to begin the deployment.

If the deployment was successful, the status should become Ready. In this example, our application called MyContainer has been deployed and the status message now tells us that the service is available at a given IP address and port number.
Success!
You’ve created a container. Nice work! On the next page, we will talk about using the CLI interface.