Intermediate Security Groups
This tutorial is part of the Cloud Two Series.
Back to Cloud TwoCategory: Intermediate
Difficulty: 2 out of 5
Duration: 37 minutes
Find a mistake? Let us know the issue here.

Creating Security Groups
Security Groups can be managed via the Nectar Dashboard
by choosing Security Groups from the navigation menu, under Project -> Network
Separate across projects
Your security groups are separate across your Cloud projects. For example, if you created some security groups in your Project Trial, these would not appear in other projects you are a member of.
Adding a new Security Group
Simply choose the Create Security Group button from the top navigation menu.
You will be guided to provide a name for your new Security Group and an
optional description.
Managing Security Group rules
Click Manage Rules button from the actions list for the security group you wish to manage.
From this page, you can add or delete rules using the buttons provided.
Adding a new Security Group rule
To add a new rule, click the Add Rule button
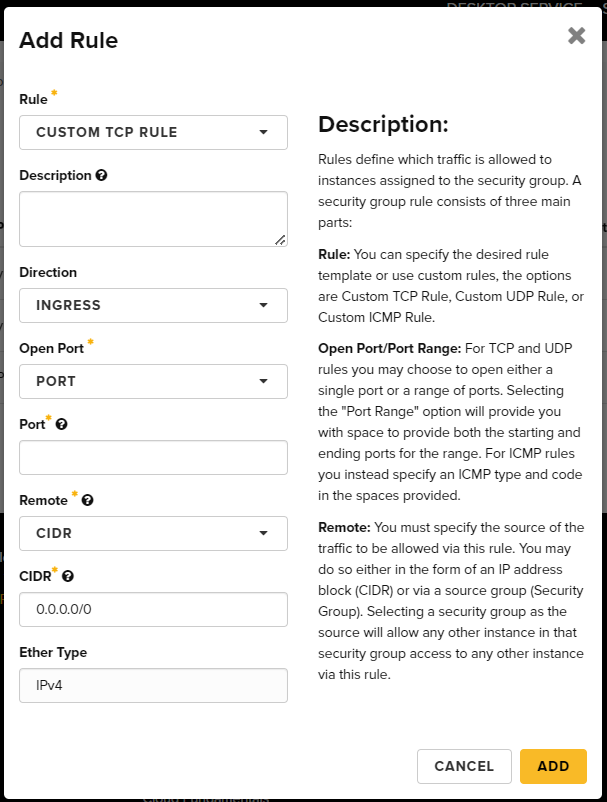
There are a number of fields presented that are significant here. Depending on your choices, the required fields will change.
Rule
You can choose either a common pre-defined service (like HTTP, SSH, etc) or a custom option, depending on your requirements. Custom TCP and UDP rules will require port numbers for their rules, but other protocols do not.
Direction
You can choose from either Ingress or Egress. You will most likely want to
choose ingress here to filter incoming traffic. By default, all egress traffic
is allowed.
Open Port
You can choose one of the following options;
- Port: For a single port.
- Port Range: For a range of ports.
- All ports: All ports for a given protocol.
Port
The port number you wish to allow acces for. If you chose a port range, you
would be required to provide a From Port and a To Port instead.
Remote
You have the option of CIDR or Security Group here. These options are
explained in detail in the next pages.